


Teaching with Keynote: #2 Document a Process
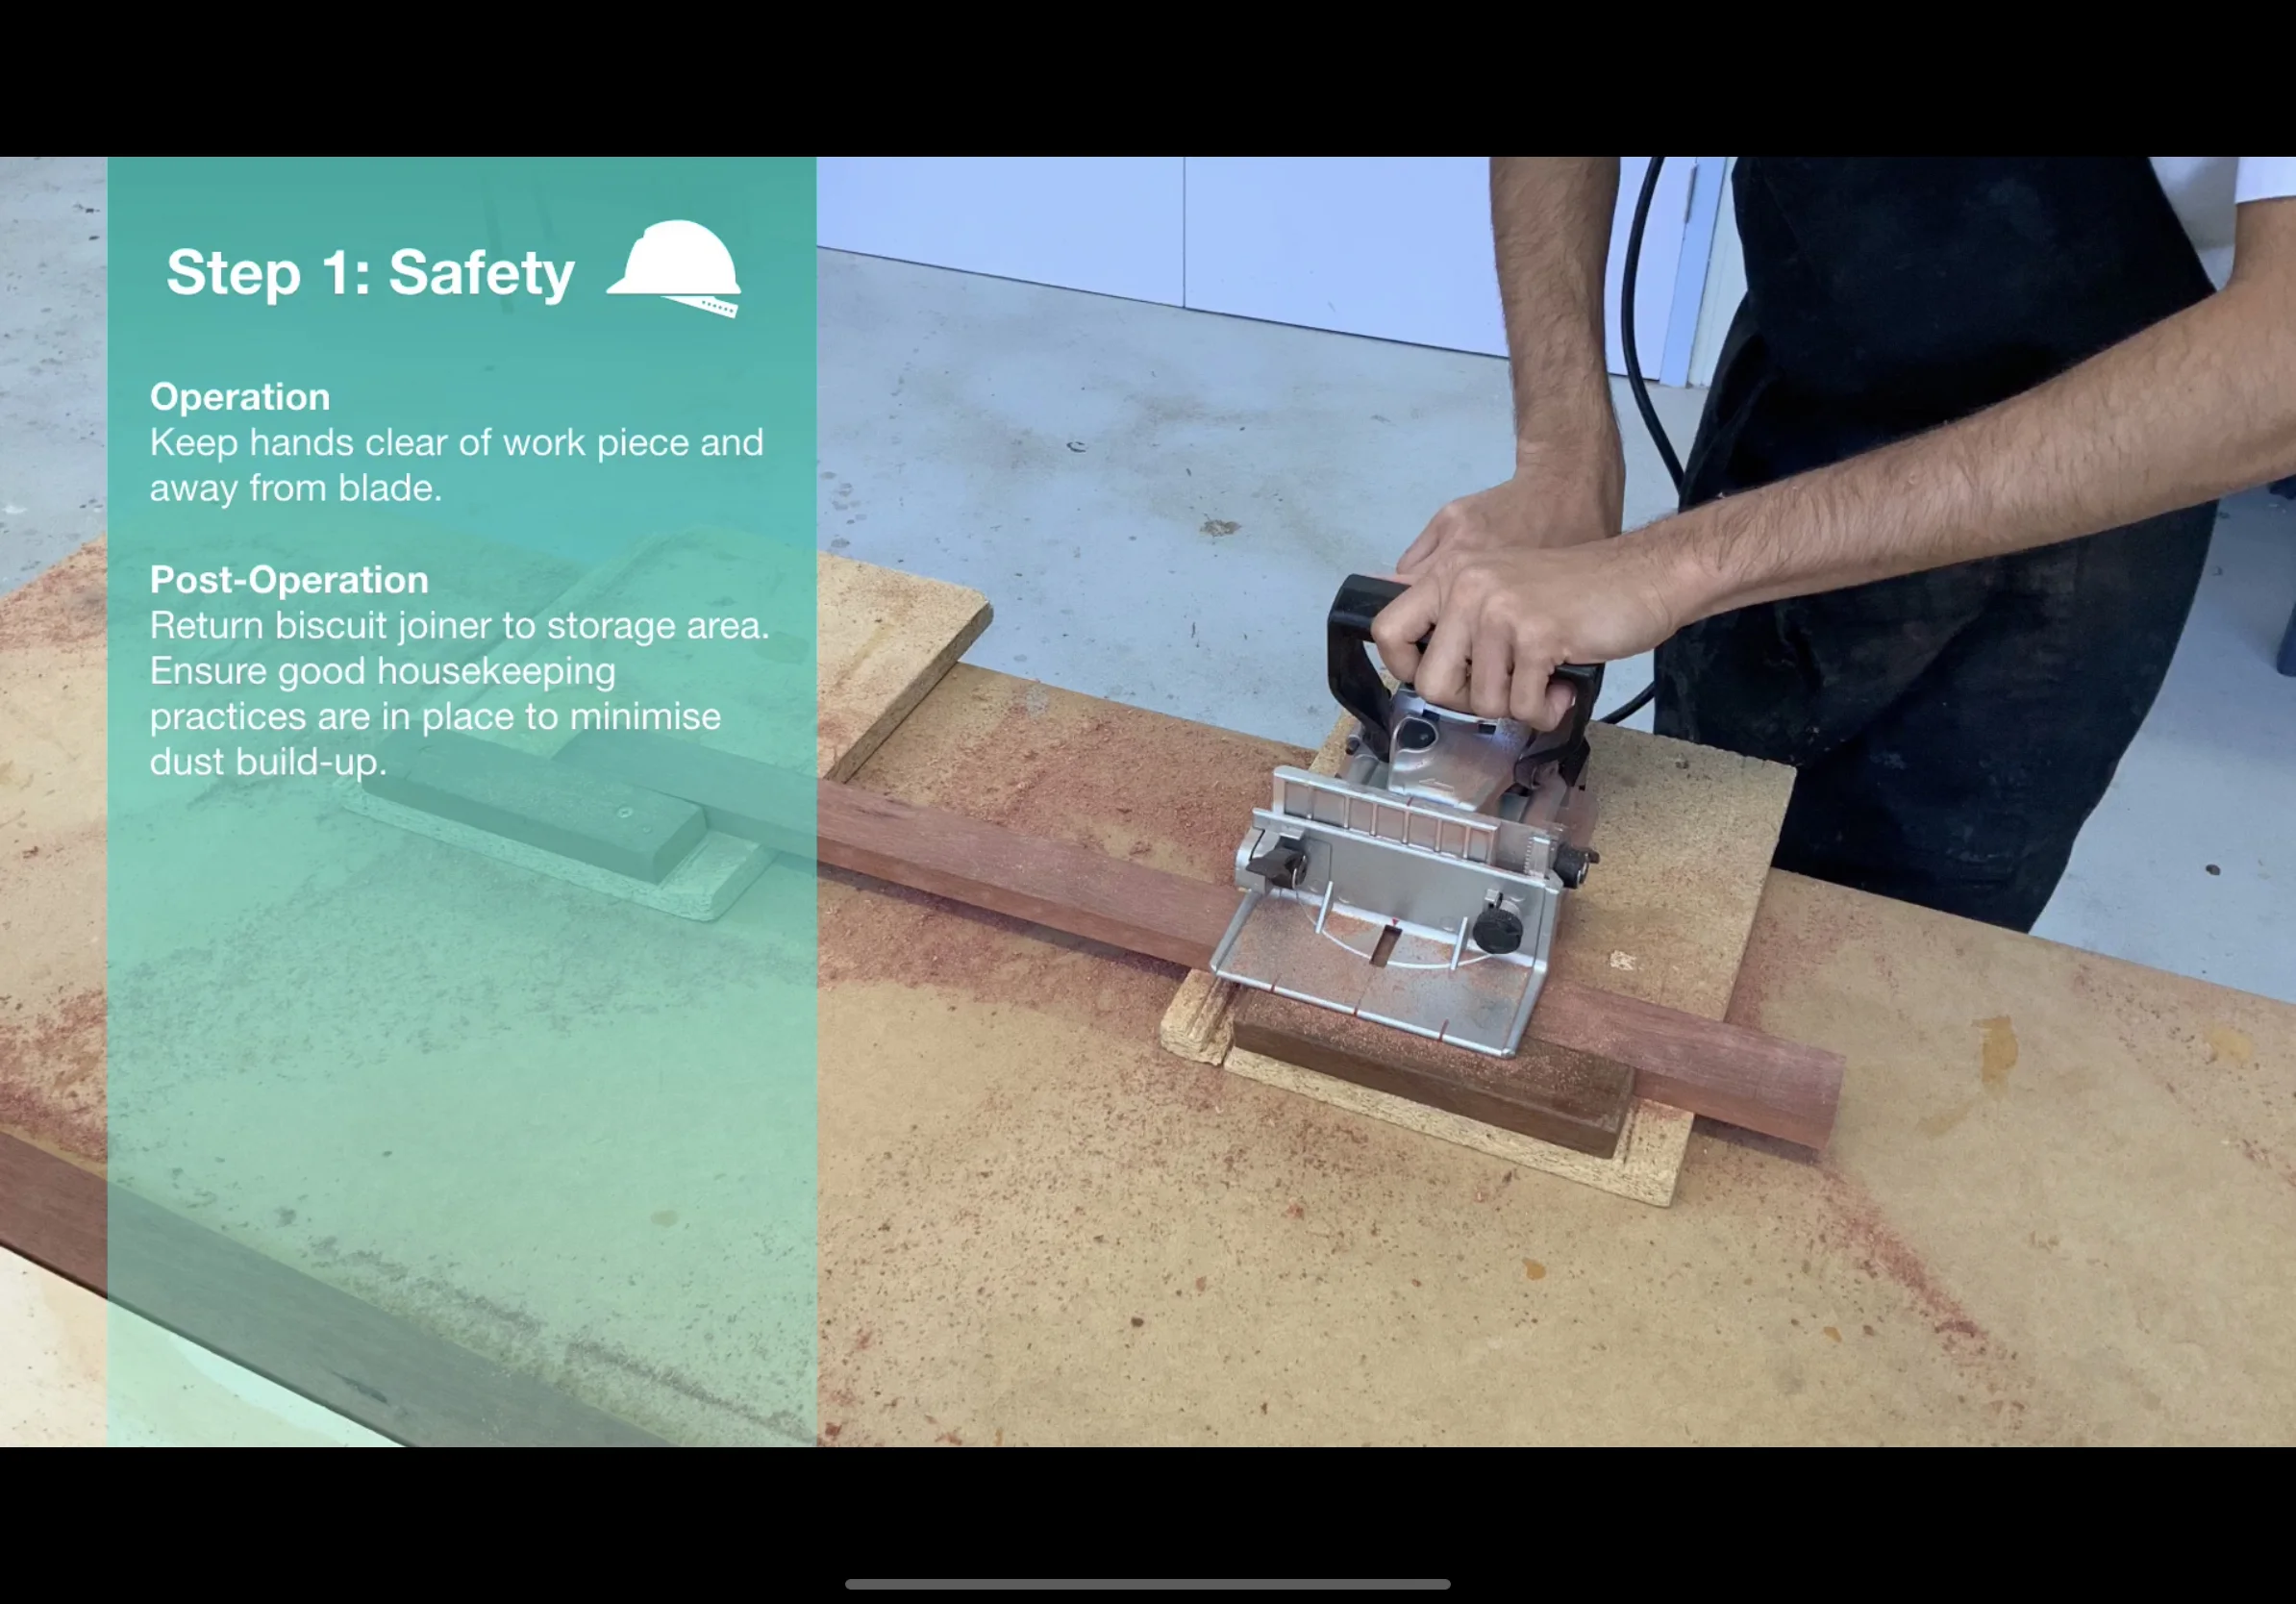
Students can use Keynote to document a process with photographs. For example, students could show the process of photosynthesis, the process of building a bed-side table or the process of throwing a cricket ball. An image (or short video) on each slide supported with audio narration and text help children consolidate their understanding.
What is it?
Students can use Keynote to document and explain steps or processes. By using a combination of photos, video and text, they can create glossy slideshows - or even export their slides as movies - that help them demonstrate and articulate understanding. For example, students could show the process of photosynthesis, the process of building a bed-side table or the process of throwing a cricket ball.
Press play and watch the example below from a Year 12 Woodwork lesson at Corpus Christi College.
Why is it effective?
By capturing each part of a process, students can deconstruct a concept and see how it is made up. Adding audio narration and text to each slide also helps consolidate students’ understanding of each stage. Full screen images work best along with minimal text so that students express their understanding in a concise and effective way. Exporting the slideshow as a movie is also a great way of saving and/or submitting their presentation! Have a go with your class!
How can I do it with my class?
Watch my step-by-step tutorial on the ‘Document a Process’ strategy below.
I hope this strategy works for you and your students.
Thanks!

Teaching with Keynote: #1 Annotate & Animate
Students can use Keynote to animate their hand-written notes on top of an image and then add audio to explain their understanding. As we know from cognitive science, a combination of visual and verbal information allows students to retain information more effectively. Here’s a screen-shot example from a Science class.
What is it?
Students can use Keynote to animate their hand-written notes on top of an image and then add audio to explain their understanding. As we know from cognitive science, a combination of visual and verbal information allows students to retain information more effectively. Here’s a screen-shot example from a Science class.

Why is it effective?
This simple technique allows us to see if students understand how things work. By labelling and annotating real-life things, we can see how students visualise information they have learnt. Adding audio is a bonus - a clear articulation of their understanding allows teachers to hear if students are on track.
How can I do it with my class?
Watch my step-by-step tutorial on the ‘Annotate & Animate’ strategy below.

I don’t know anything about Keynote, can you help?
Yes – take a look at my tutorial video below on ‘The Basics’ of using Keynote in class.


Digital Creativity with iPad #CorpusCreates
Read all about our new Digital Creativity course and how it is being integrated into our school in Year 7 and 8. We’re really excited to share how creativity with iPad is changing our classrooms, practice and assessments! Have a look!
After many months of preparation, our all-new Digital Creativity course begins for our Year 7 and 8 students. The course is based on Apple’s Everyone Can Create curriculum and is designed to provide students with core skills in photography, video, audio and drawing. We feel that these skills provide a vital platform to kick-start students’ creativity so that they can demonstrate learning in new and innovative ways - whether that be creating learning visuals in Keynote for Science or recording slo-mo videos for formative assessment in P.E.
In recent weeks, we have run a social media campaign on Twitter to showcase the way our teachers and students utilise technology. Teaching staff from our Digital Creativity Team have shared inspiring ideas using the hashtag #CorpusCreates to highlight how iPad is transforming our practice. Take a look at the collection of ‘What If’ videos below:
The Digital Creativity curriculum will be assessment free but will require students to submit key projects which demonstrate an accumulation of skills. For example, a final project may require students to create a video in Clips but include evidence of multiple skills such as applying filters to enhance mood, vertical/horizontal panoramas, adjusted focus and exposure (to capture the atmosphere of a setting). Teaching students these core skills will ultimately lead them to experiment, tweak and improve their digital work and will encourage them to take ownership of their own learning. Students will begin to tell richer stories and find their unique voice.

Stay tuned for more on our Digital Creativity course. I’ll be posting some student work, class photographs and updates on the impact creativity with iPad is having on learning.

Teacher Story: Bringing Dystopian Fiction to Life with Clips
Last year, I was fortunate to have been featured on the Apple Teacher Learning Centre. My story showcased the video app, Clips and how it was used to bring senior students’ creative writing to life. Read about how I introduced this task to my class to inspire and immerse them in their writing.
Last year, I was fortunate to have been featured on the Apple Teacher Learning Centre. My story showcased the video app, Clips and how it was used to bring senior students’ creative writing to life.

My aim was to challenge students to capture the atmosphere of their creative writing with images and sound. Students created videos that mirror the stark, visceral, and lifeless imagery that is characteristic of the dystopian genre. Choosing the right music also helped students feel immersed in the worlds they created in their writing.
To begin with, I provided an example video to demonstrate what I wanted my students to create. Through a combination of images, text, and music I brought a passage from Cormac McCarthy’s The Road to life with Clips. Check it out:
As students created their Clips videos, they began to identify ways to improve their narratives. I saw significant improvement in their writing after the activity - in particular, I found the task appealed to reluctant learners and more disengaged students.
When students watched back their work, by seeing their language on screen with Live Titles, they could really tell what worked well and what didn’t. Clips encourages students to be concise and really focus on their language, the key aspects of their paragraph, what they wanted to achieve, and what they really wanted the reader to think and feel.
If you’d like to know more, check out my Teacher Story on the Apple Teacher Learning Centre.